Tea with Lili

I probably should have posted this before Mother’s Day, but c’est la vie.

It’s good for any gift giving scenario.

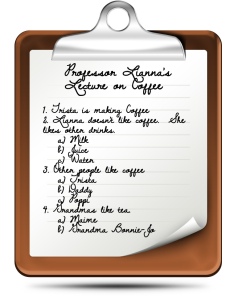
Professor Lianna's Coffee Lecture

My step daughter is 3 1/2, the most knowledgeable toddler age!  I often get up super early with her on weekends.  After I make her breakfast I can begin my morning coffee ritual.  The caffeine gods must be appeased.  Lili is at that age where she likes to recite all the facts she knows about any object she sees.  I am often the recipient of a thoroughly researched lecture on coffee.  Having heard the lecture numerous times, I am familiar with the highlights.  If you would like to benefit from her wealth of coffee knowledge, see the notes!

When I asked Lili what we should make for the Grandmas, she said, “Tea!”  So tea it was.  I saw this awesome blog on Pinterest (obviously).  Originally it was intended for Valentine’s day….  But I live on the edge.

As I went through the process, I added a few tips of my own which I will list below.

Tip #1 Don’t let the toddler determine the amount  of tea for the tea bags.

Tip #2 Don’t let the toddler carry the finished product.  Especially if the lid is not secured tightly.

Tip #3 Make sure the recipient is not allergic to any components of the tea.  Like cats.

Tip #4 Don’t put cats in your tea.

MATERIALS: coffee filters, embroidery floss, sewing needle, scissors, crayons, glue, paper, loose leaf tea, puppies, rainbows, hugs, sunbeams etc…

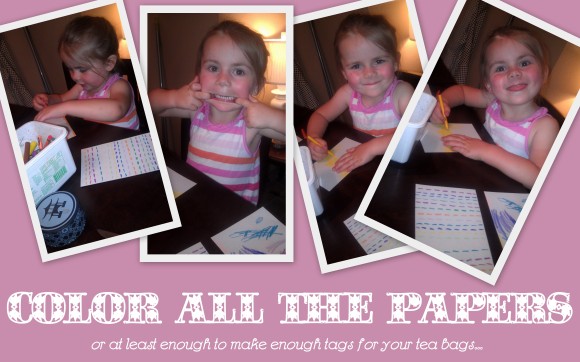
STEP 1:  Make your tags!  I had Lianna color on one side of multiple sheets of paper.  This was her favorite part.

Blog Photos2

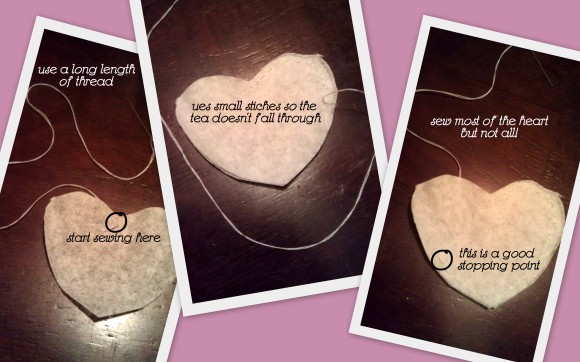
STEP 2: prepare your coffee filters!  Fold the coffee filter in half, and then make another fold.   Cut out into a half a heart, and it turns into two hearts.

Blog Photos3

STEP 3:  Prepare for heart surgery!  Start sewing at the top of the heart where the two sides meet.  When you start, put the knotted end of the thread on the inside of the heart.  Using small stitches, sew along the edges of the heart.  Sew about 2/3 of the way around the heart.

Blog Photos4

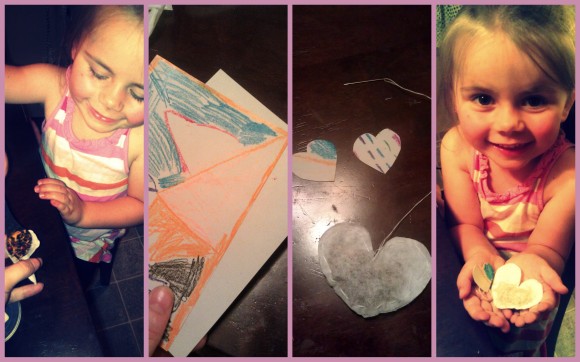
STEP 4: Load up!  I put 1 teaspoon of loose leaf tea in the heart before sewing it the rest of the way.  When you finish sewing, leave the remaining thread long enough to attach the heart tags.  If you have a heart-shaped hole punch I strongly suggest you use it!  I do not.  So I cut the hearts out by hand.  They are less than perfect.  Far less.

Blog Photos5

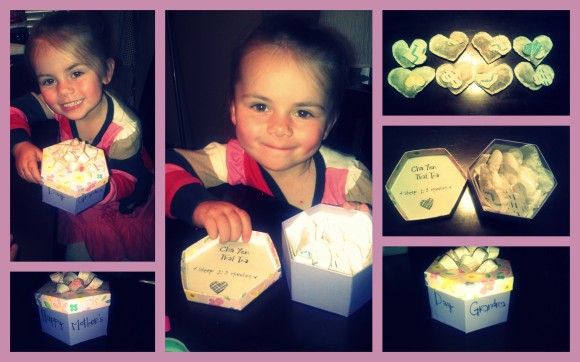
STEP 5:  Presentation!  I picked up some boxes from the dollar store.  I lined the box with tissue paper.  Before I set the tea bags inside, I wrapped the thread around each tea bag and tucked the tag in.  That way they don’t get tangled up!

Blog Photos6

We made the bow using this tutorial.  I will be using it for all future wrapping projects.  So cute & helpful!  I searched & searched for homemade bows, and this was my favorite tutorial!  You should check out her blog; I am absolutely enamored.

That was our Mother’s Day!  Both Grandmas loved it  🙂  For obvious reasons.
Tagged , , , , , , , , , , , , , , , , , , , , , , , , , ,

Singing & Framing & Painting & Hanging

I know I’m a bit late with the chalkboard paint craze….  but that is mostly because I am supremely lazy.  I finally got the paint when I started making things for my wedding.  You see the ornately framed DIY chalkboards everywhere on Pinterest.    They are incredibly easy to make and so cost-effective!

We only had four months to plan our wedding, and only $6K.  We had saved up half, and my mom contributed the other half.  That meant cutting as many corners as possible!

Instead of paying for paper programs, I made a chalkboard!

Instead of printing a menu, I made a chalkboard!

I picked up a ton of frames from GoodWill for $4-$10 each.  Then I spray painted them black (our colors were black & white with a splash of teal)Image

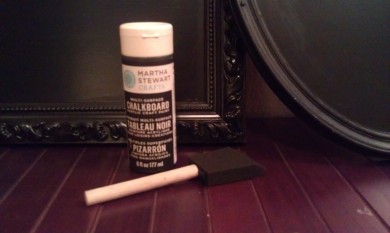
Then I picked up some chalkboard paint.  I saw this tutorial on making your own paint, but I was in a bit of a time crunch and didn’t want to risk anything going awry…  I will probably try it out now that I’ve got free time again!  It looks much more affordable than the Martha Stewart brand I picked up.

Here are the materials I used:

Image

To save time I grabbed a chalk pen and I forgot to prime the chalkboards…..  They looked great for the wedding, though!

Image

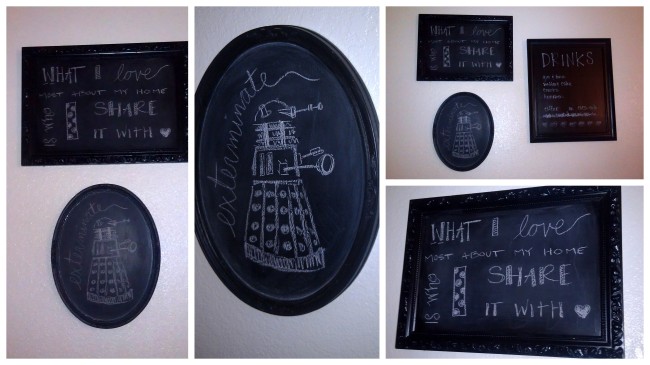
Once we got back from the wedding, I repainted the chalkboard frames.  And properly primed them!  So now I can change them as often as I like.  My husband requested that we keep the drink menu as it was his favorite.

Image

I’m really happy with how they turned out 🙂

Image

Let me know what you think!

Tagged , , , , , , , , , , , , , , , , , , , , , ,

Fight Tedium With a New Medium

Ever hear that phrase “jack of all trades, master of none?”  I think that may be me!  I love all different kinds of projects but I’m not sure that I want to narrow down my field.  If anything, I want to broaden my horizons!  So rather than learning the fine art of painting, I stuck to silhouettes.  It may or may not be cheating.  I haven’t decided.

I got the idea from seeing this amazing blog:  http://www.craftedlove.com/2011/08/diy-newspaper-art.html

LOVE IT.

I do have a few improvements, though!

MATERIALS:  Canvas, newspaper, mod podge (or a substitute), paint brushes, black acrylic paint, matte medium finish

First the mod podge substitute:  http://www.babblingsandmore.com/2011/10/homemade-mod-podge.html?m=1  This blog was super helpful!  I didn’t necessarily need the ratio to be equal.  I found a three parts water to one part glue to be just as effective, not to mention it makes the glue last longer.    I have had the giant glue bottle pictured below for almost 2 years now and as you can see, I’m only halfway through it!  I haven’t had any problems with it, either!

modpodge

Step 1: tear the newspaper into strips.  I think it’s best to avoid adverts, graphics and large print fonts.  Ultimately I think they detract from the artwork.newsspaper D

Step 2: begin application to canvas!  I started in one corner and worked my way around so the mod podge didn’t dry out.  I put a layer directly on the canvas and another on top of the newspaper.  BE AWARE:  it will wrinkle!  This is totally normal!  as the mod podge dries out the wrinkles & bubbles disappear.  Here’s how my most recent canvas turned out:

Step 3: paint to your heart’s desire!  If you’re not one for free-handing, pick up a stencil from any craft store!  I had some space to fill on my wall, so I actually stretched my painting over two canvases.  I painted a tree.  Because of my love for trees.  Dead ones in particular.  There is one branch that bothers me….  I may or may not go back and fix it.

newspaper 2

Step 4: the finishing touch!  Newspaper, as we all know, yellows as it ages.  To fight paper-jaundice I suggest covering it with a clear matte finish.  This one has worked well for me:http://www.amazon.com/Liquitex-Professional-Matte-Fluid-Medium/dp/B000IYWYNE/ref=sr_1_26?s=arts-crafts&ie=UTF8&qid=1366858009&sr=1-26&keywords=matte+finish  You can find it at most craft stores!

Here is how mine turned out:

newspaper 3

Tagged , , , , , , , , , , , , ,

Bottle, not throttle!

There are lots of opinions about weddings.  You could say, too many opinions.  I would never say that, of course.  But someone could.  What kept me sane during the madness of wedding planning were the projects.  I am a huge fan of the DIY.  I saw this idea on Pinterest and was inspired!  So when something goes awry I recommend you bottle, not throttle!

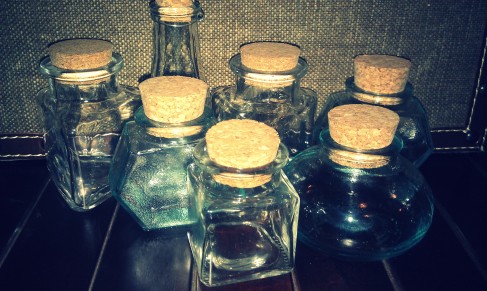
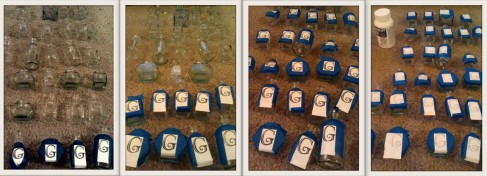
STEP 1: I started going to Goodwill and collecting all the tiny bottles I could find.  I considered having a variety of colors but in the end I went with clear.  I was a little worried about not having enough for all the guests so I picked up a set of min-jars with corks at Michael’s.  They don’t have them online, but Amazon does: http://www.amazon.com/Mini-Glass-Jars-Stoppers-10ml/dp/B007XV10HQ/ref=sr_1_3?ie=UTF8&qid=1366494233&sr=8-3&keywords=jar+cork One thing I advise you avoid is using those with twist lids.  The corks don’t look as good on a twist jar, in my humble opinion.  You can also buy a variety of corks at the craft store if you lose any!Image

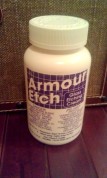
STEP 2: The etching process!  My (now) Aunt Robin was an absolute LIFESAVER in this part of the bottling   I could not have done this without her!  My original plan was to cut out a stencil by hand and etch each bottle one by one.  This was a very foolish notion.  Robin has magical powers with which she can cut out intricate lettering onto contact paper in mere minutes!  She calls this magic “Cricket.”  Before I consulted with Magic Aunt Robin I bought etching creme.  Here’s the brand I used:

Bottles Etching

A little pricey at about $30 for 10 oz, but I would need a lot (or so I thought).  Again, so foolish!  Magic Aunt Robin informed me that not only does it take very little etching creme, but it is re-usable.  With that in mind, if you are working on any etching projects I suggest you get the smallest bottle.  Here is what step two looked like:

Image

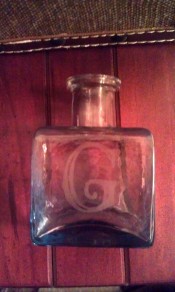
Once the etching cream finished its work it looked like this:

Image

My ever helpful relatives helped fill them with lemonade before the ceremony and I made a little sign to display with them.  Here’s what they looked like during the setup:

Image

You could even make little tags to attach to each bottle!  Have your initials and the date?  Any way you display the bottles, they are super cute!  Love Potion!  Make them!  Do it!  Bottle not throttle!

Tagged , , , , , , , , , , , , , , , , ,

An appropriate use of an inappropriate “novel.”

Paper Dahlias

Paper Dahlias

I love books.  A lot.  Most people who have met me know this.  I tend to get a lot of books as gifts, which is AWESOME.  Every once in a while someone passes along something wretched.  Something painful.  Something that leaves young female minds believing they should throw themselves off cliffs when their boyfriend leaves.   Something that…..  sparkles.

Before I discovered the glory of Pinterest I was at a loss as to what I should do with such gifts.   Should I have a bonfire?  I tried selling them to used bookstores, but no one would take them.   Now, however, I have the perfect outlet!

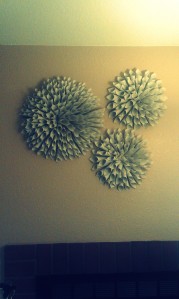
I just rolled each page into a cone and glued the edges down.  Then I glued them onto a circular piece of cardboard.  Super easy and super cute.  You can head to GoodWill and pick up a few paperbacks if you don’t have any less than desirable novels lying around.  They make great gifts!

This was one of the easiest pieces of artwork I have ever made.  And the simpler the task the more wine can be consumed.  Let me just tell you, I had a wine-tastic evening making the dahlias.

Tagged , , , , , , , , , , , , , , , , , , ,
Memories Moms Create

There is no way to be a perfect mother.. but million ways to be a good one

musings of ur

A wannabe writer doing what she knows the best.

B. Lovely Events

For The Love Of Pretty!

embrace my space

love what you have. have what you love.